 |
Sometimes, a garment that should be the easiest thing to make ends up being crazy difficult for no real reason. That was kinda my experience with these pajama pants.
I think the main reason for the unexpected difficulty was because of all the alterations I ended up making to the pattern. I used Butterick 3698, a unisex pajama pattern, because it looked like exactly what I wanted (and I liked that it had a fly). Cutting the pants out was pretty annoying, since I kind of hate matching plaids, but over all I'd say that part turned out pretty well.
 |
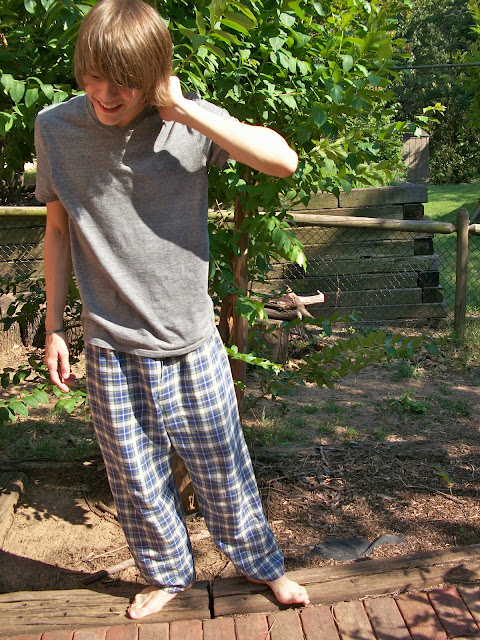
| I think he likes them! Also, isn't he a good model? |
That's when things got interesting. In the pattern, each pant leg is just one piece with an inseam; there are no outer side seams on these guys. However, as I had planned on adding pockets, this was a problem. So I just cut a side seam in anyway, and sewed in the in-seam pockets with a very small seam allowance.
But then I sewed the inseam as well, and looked at the legs. They were huge. Like, I had even cut out a size smaller than he normally wears, and the legs were still so baggy they looked like clown pants. I know pjs need to be baggy, but really? This was insanity. So I went back and took and extra inch off each leg, which helped quite a bit. They're still quite loose, but at least they look like normal pajama pants now.
I also didn't like how the pattern gave the fly instructions. There was a lot of excess fabric, which I trimmed back. The pattern also didn't call for any sort of closure, but the fly was gaping so dramatically that he couldn't have worn them anywhere if I didn't add something. Two buttons did the trick nicely, though.
Finally, I did the waist band a little differently; after sewing the elastic in, I did three rows of topstitching over it for a more professional look. This is really easy to do, and will make any elastic waistband look a ton better; just stretch the waistband out till the elastic is taut and sew over it. After you're done, it will probably have stretched out a bit, but that's okay. Just hold an iron over the waistband and steam the heck out of it; you can actually watch the waistband shrink back to the right size! Cooooooool.
I'm really happy with how they turned out, but more importantly, so is Andy! I don't think I'd use this pattern again, because of the few odd little things I mentioned. However, I did enjoy how quickly these pants came together. Now I'm gonna make something else for myself; I'm currently starting on a clutch that's gonna be super lacy and girly. I hope you guys had an awesome weekend! :)


Well done - I reckon they look great! Can you make a pair for my husband? :)
ReplyDeleteRonnie xo